How to Deploy Bots
Prerequisite:
You have access to your Github repository from the original NFCC sandbox deployment:
- For Azure deployments, your Github repository name is “azure-functions-deployment-template.”
- For AWS deployments, your Github repository name is “aws-functions-deployment-template.”
Steps:
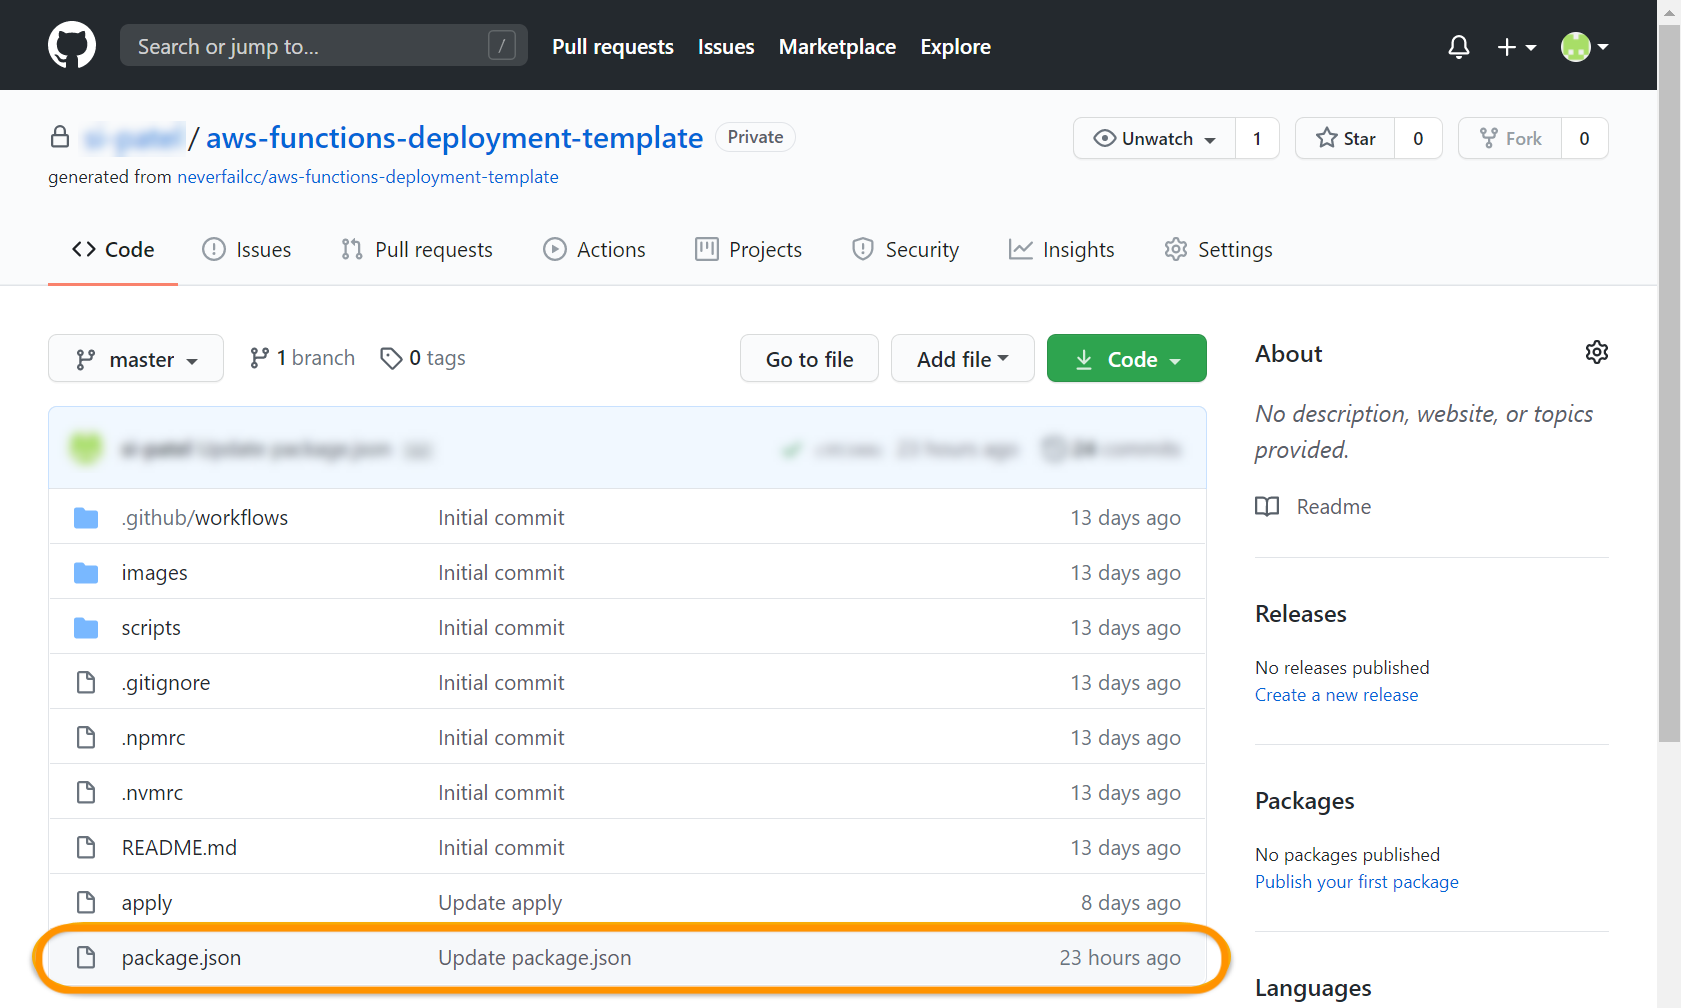
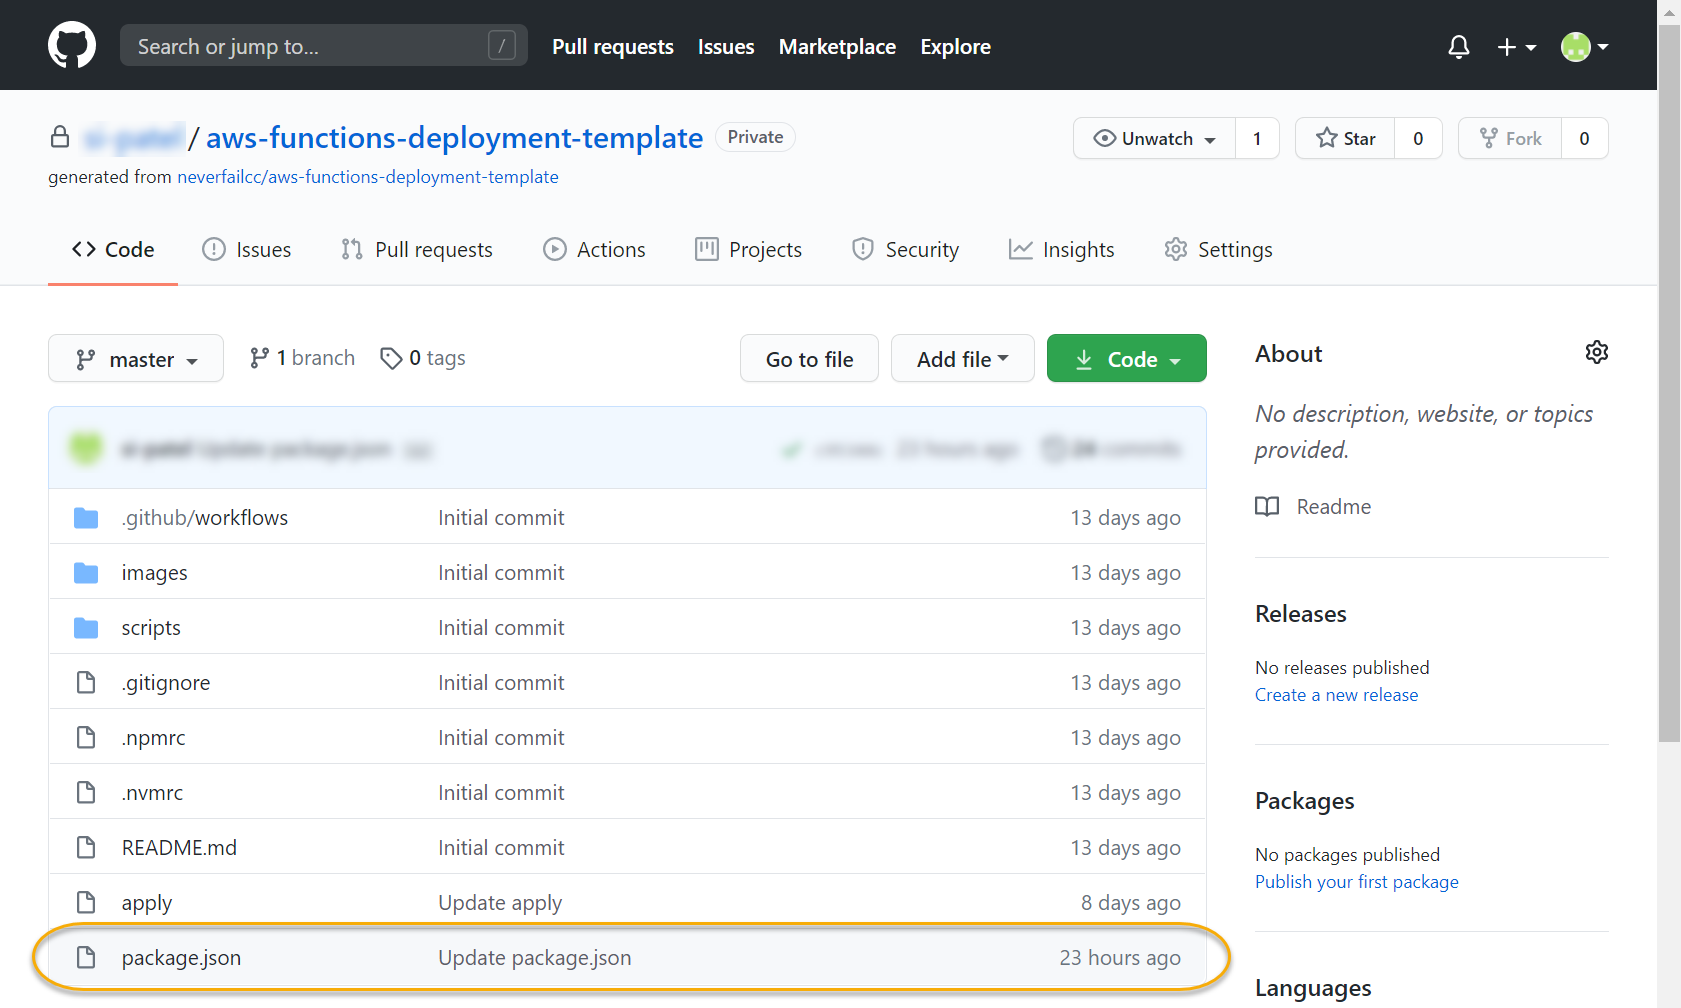
In GitHub, locate the AWS or Azure function deployment template you created based off of either azure-functions-deployment-template or aws-functions-deployment-template.
Locate and select the package.json file on the master branch.
Select the pencil icon to edit the file.

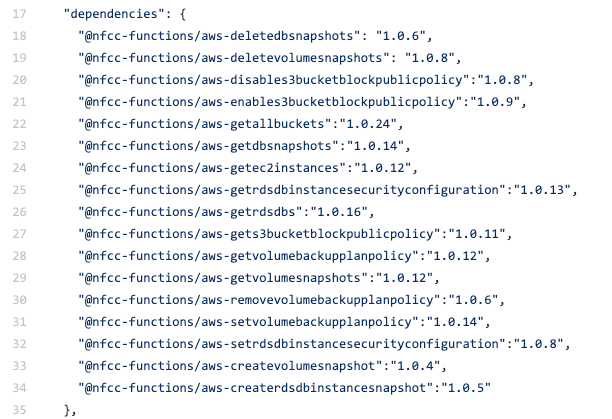
Insert the new package line text provided in your Task into the dependencies section. We recommend you to insert it in a new line just below the line “dependencies”: {, (line 17 in the sample image below). Please note, for proper JSON formatting, every line within the dependencies section should end with a comma except for the final line.
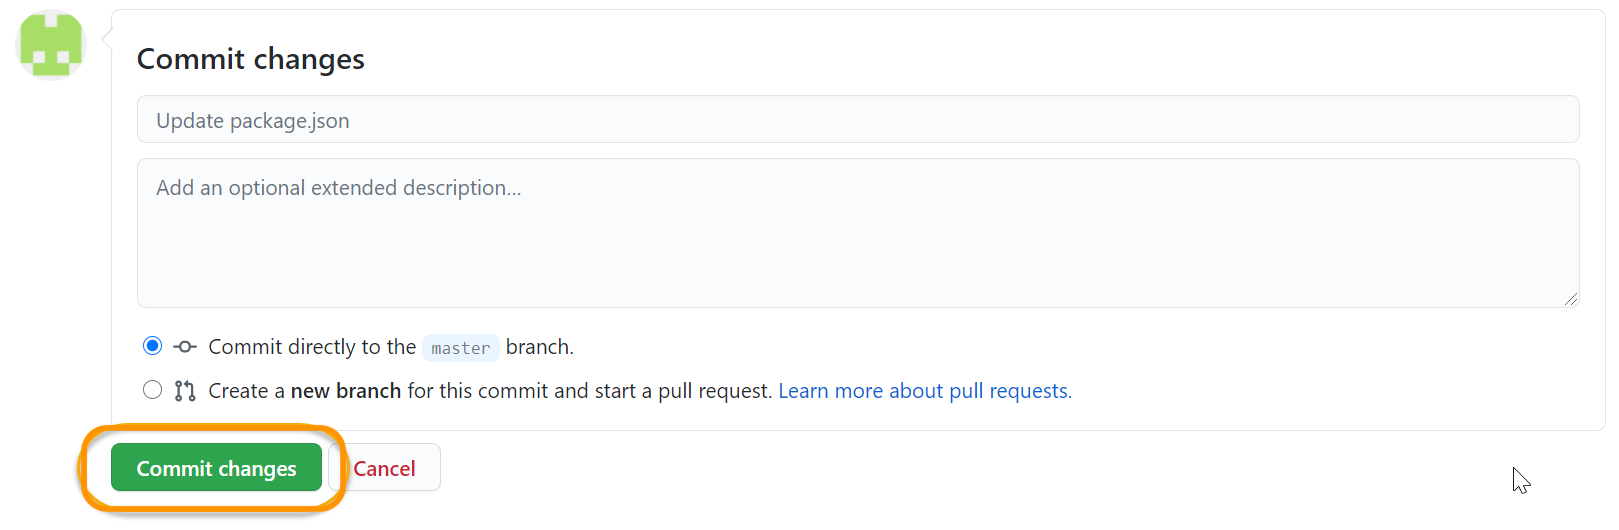
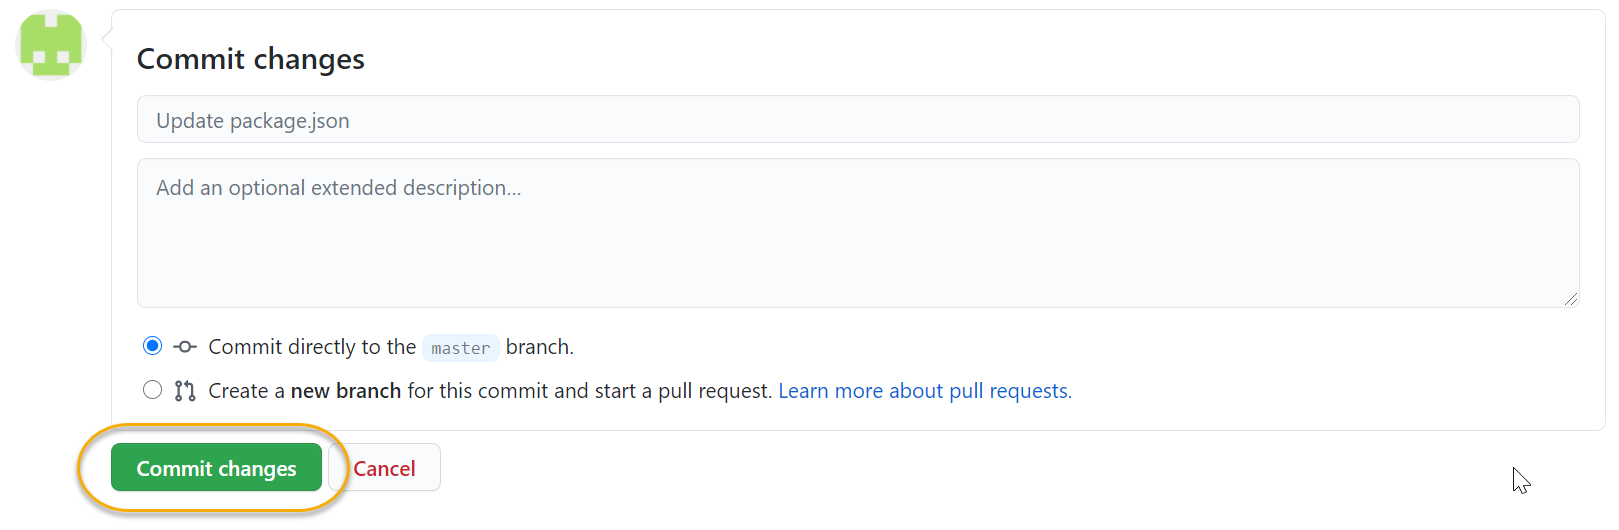
Scroll to the bottom of the page and select Commit changes. Optionally you could add the name and version of the bot in the description.
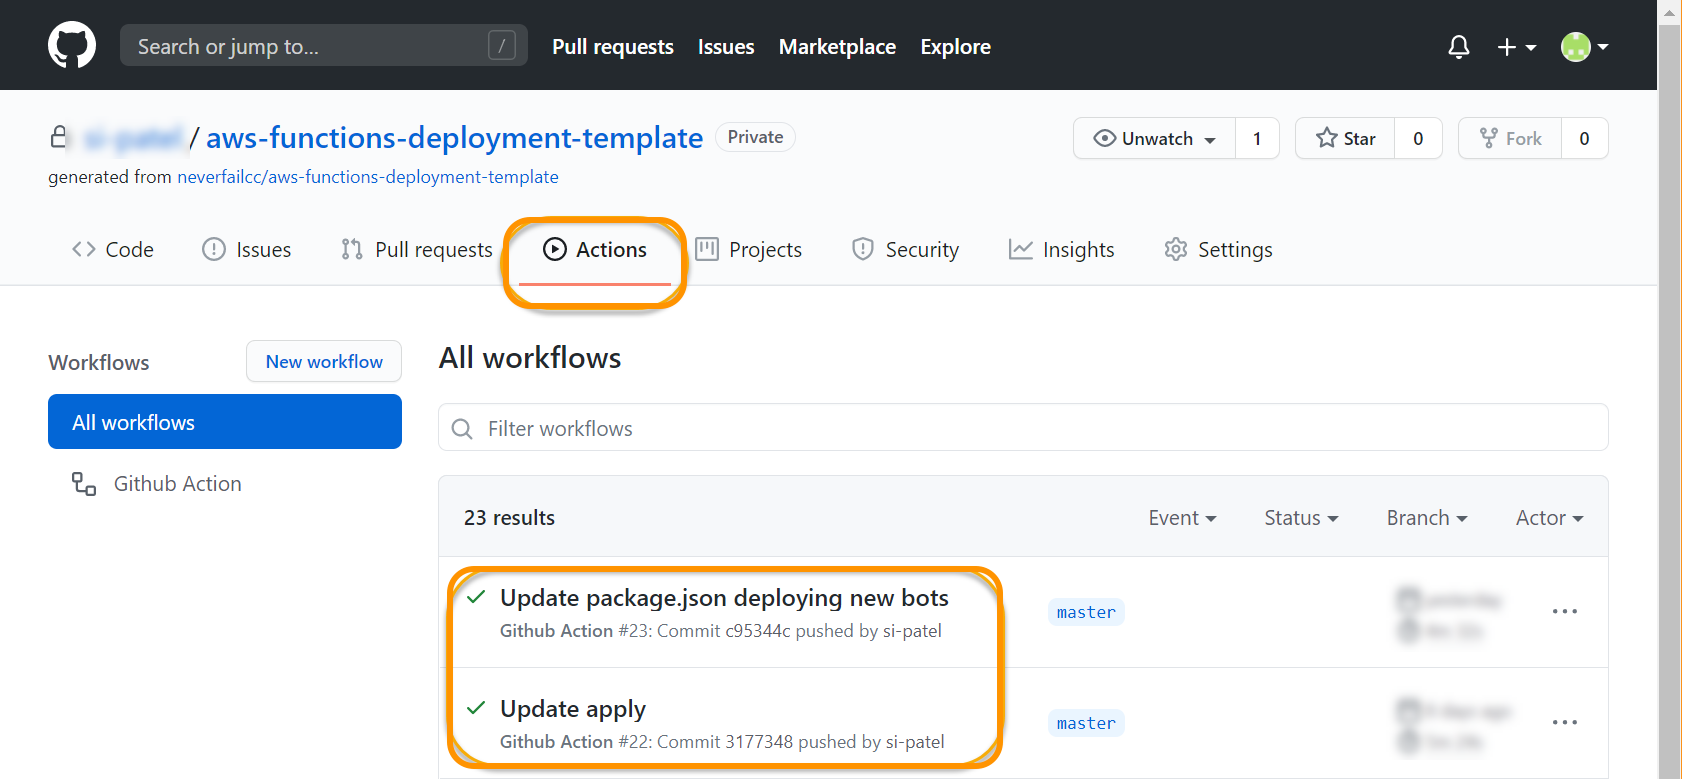
After selecting Commit changes, GitHub Actions will run an update. Select Actions from the nav bar and you’ll see the running workflow. Once the workflow completes successfully, your Bot will perform an initial run and be scheduled for follow up runs per configured frequency.
Troubleshooting
Terraform error:
If you happen to get an error with the update apply action, such as “Error: Terraform exited with code ***,” please perform the following steps.
- Locate and select the package.json file on the master branch.
- Once the package.json file is open, review the section below line “devDependencies”: { (line 37 in the sample image below).
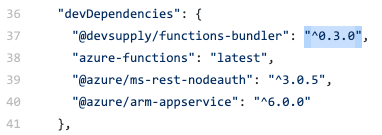
- Please ensure the version is set to “latest", . If the version is different than this, please edit it to match this, then scroll to the bottom of the page and select Commit changes.
- The commit will automatically trigger a re-run of the Github Action to deploy the bot. Please feel free to visit the Actions tab in your Github repository to review the latest execution.
Lambda API gateway timeout:
Lambda API Gateway has a default timeout set to 30 seconds and cannot be changed. Some bots will have a long execution time potentially based on algorithm complexity and input set size and if those 30 seconds are exceeded, call to that bot will fail with “message”: “Endpoint request timed out” :

If bot does not collect any evidence and a timeout is suspected, bot can be tested by using postman or other rest client. A POST call should be made with headers content-type : application/json and x-api-key :
Bot request URL and api key can be found following the steps bellow:
- Click on aws lambda function which represents the bot
- On configuration click on API Gateway
- Expand details
- You can find API endpoint which is bot URL and API key

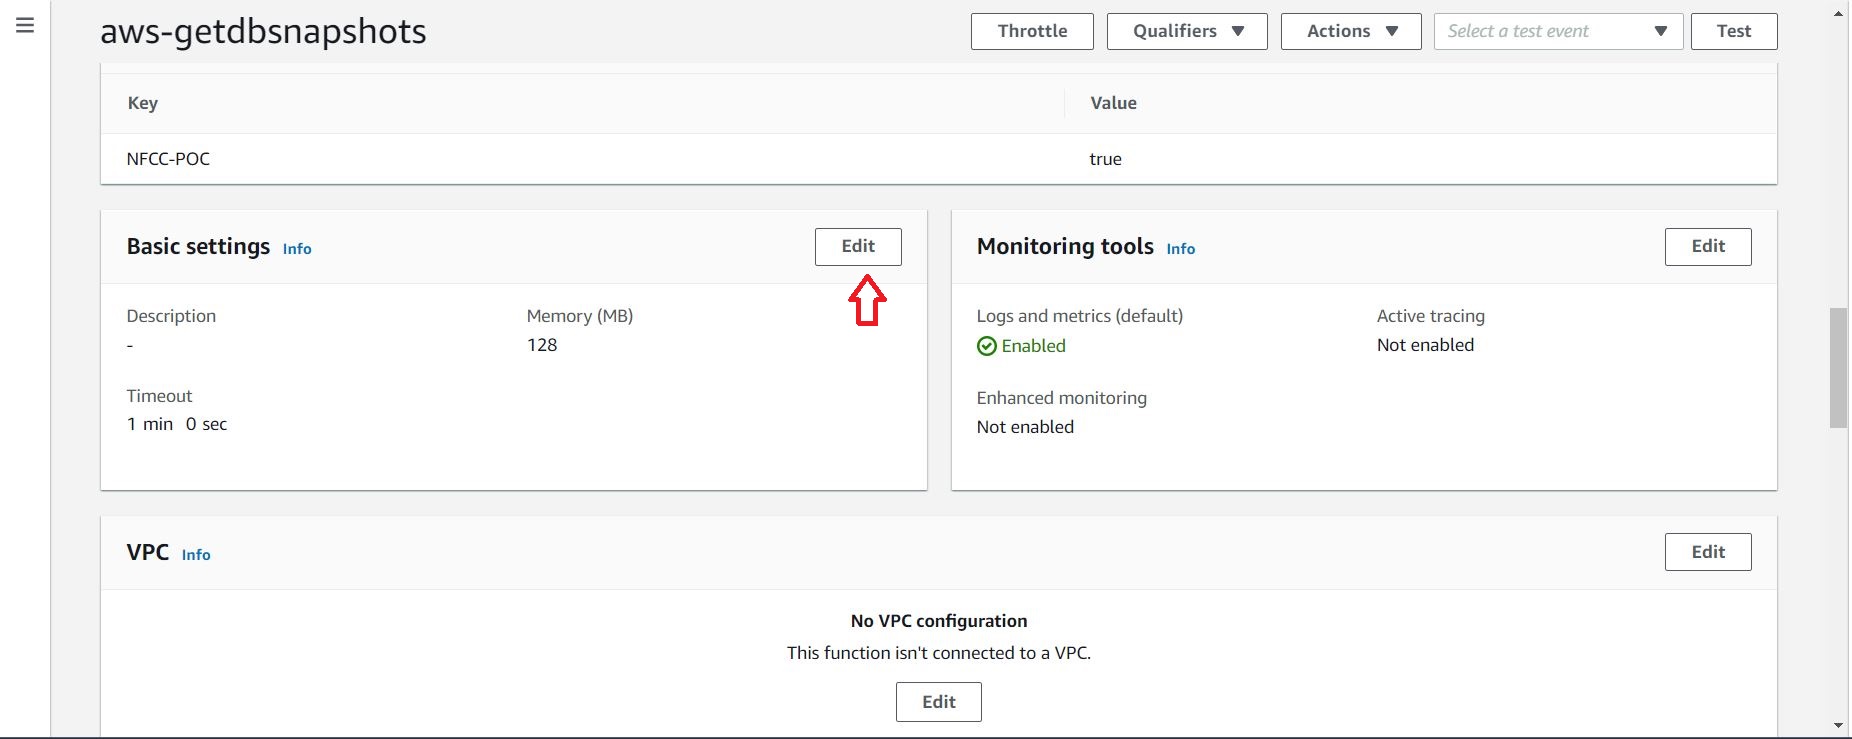
If a gateway timeout occurs, you can obtain a better response time if lambda’s memory is increased:
- Go to AWS lambda
- Click on lambda function which is failing with gateway timeout
- Scroll down until you see Basic settings
- Click on Edit
- Increase Memory value to 2048 or 4096 (MB)