Deployment Sections
Power BI Dashboard Deployment
Welcome to the Neverfail Continuous Controls (NFCC) Power BI Dashboard Deployment phase. Here you will be tasked to deploy and configure the CTAC Power BI App using an app link and a set of database credentials provided by Neverfail.
The approximate time expected to complete these tasks is 10 minutes.
Deployment Prerequisites:
Before proceeding with this deployment, you will need the following data points and application access credentials:
Database Username / UUID: Provided in your task system ticket.Database Password: Provided in your task system ticket.- Power BI Pro: Licensing (https://app.powerbi.com)
1. Power BI App Deployment
Login to https://app.powerbi.com/ using your normal credentials.
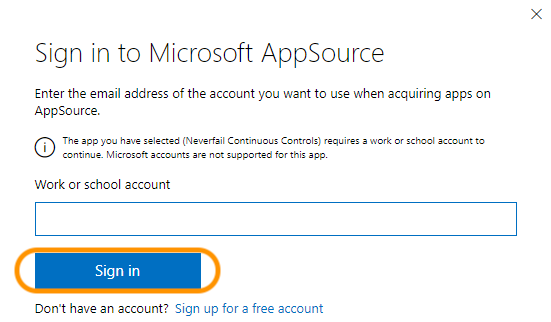
Access the Microsoft AppSource site at https://appsource.microsoft.com/.
Search for “neverfail” and click the Get it now button on the app result.

AppSource will require you to Sign in.
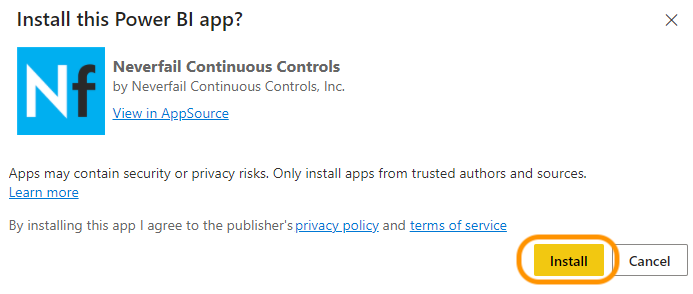
After, you will need to Install the app.
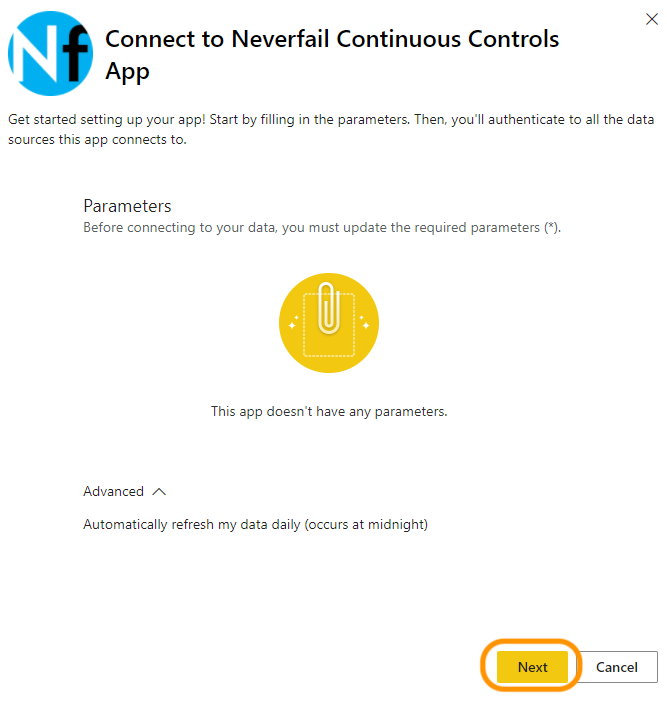
Power BI should indicate that there are no parameters to the app, proceed and click Next.
Click Continue on the new window.

After a moment, the app will open in the Power BI website, and a window will prompt to name the workspace and install the app. If you cannot install it, a Pro license may not be available.

Input name “NFCC App” or any other desired name, then click Install.
After a moment, it will show a window indicating the app has been installed.

Click Go to app.
Select Connect Your Data.
Input the provided
Database Username / UUIDvariable into the “User name” field.Input the provided
Database Passwordinto the “Password” field.Set “Privacy level setting for this data source” field to Private.
Click Sign in.


2. Scheduling Data Refreshes
By default, scheduled refresh frequency is daily, but can schedule up to eight times per day. It is recommended to set the refresh timing at the bottom of every hour during your normal work block.
- Click Go Back and navigate to Workspaces in the left-hand menu.
- Click the Datasets menu.
- Under the Actions section, click the icon to Schedule Refresh.

- Expand and set the Scheduled refresh section to have up to eight refreshes. Consider setting them during normal work hours, at the bottom of the hour.
- Click Apply to save.

